


For those who have ever attended a good St. Patrick's Day parade, a majority of the entries are families whose ancestors originated in Ireland. They form in family groups and walk the parade route waving and showing their pride as an Irish descendant. Many of the parade walkers carry the traditional walking stick known as a shillelagh (usually pronounced shill-lay-lee). For more history of the shillelagh, click on this link: Irish Culture and Customs. Many of those who carried the shillelaghs had one feature about them; they were all different. It was obvious some were store bought, but most were hand made. All of them, however, were very attractive.
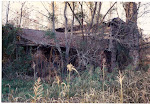
I did some research and found many web sites explaining how to make a shillelagh from scratch as did the Irish so many years ago. I decided to try my hand at this art craft. Knowing the wood used was not readily available here in the Low Country of coastal Georgia, I looked for a wood that would be comparable to the oak or blackthorn tree used in original shillelagh construction. Our most common small tree/large bush here is the Mayberry (Vaccinium elliottii). Mayberry is, actually, a blueberry bush that grows very large, up to 10-15 feet. The wood is light and very hard so it should make a good substitute. During the process of clearing Berry Oaks, we have cut many of these bushes. I looked in our pile of brush and found the best piece. It had been drying for several months so it was perfect.
First, the protruding branches were cut off with a small buck saw so the piece would be the approximate size necessary. The handle is a bit big, but it can be carved that down to a good size. A measurement was taken of the arm at a 90 degree angle to the ground. Several inches were added to assure it could be trimmed, if required, later on. Most important, at this phase, is to have enough wood to work with. You can always cut it, but you cannot add it back on.

That's all for now. Stay tuned for Part 2.
Signing off from Berry Oaks.
No comments:
Post a Comment